Step By Step Instructions for setting up dual tracking with GA4 and Universal Analytics using Google Tag Manager
Please Note: This guide assumes that you already have a Google Analytics account set up, and are using Google Tag Manager to integrate your website tracking on your website. Not already using Google Tag Manager to integrate Universal Analytics on your website? Check out Google’s guide: Deploy Universal Analytics with Google Tag Manager. Once you’ve got that taken care of come back and we’ll walk you through setting up dual tracking.
In this guide we will walk you through the steps needed to set up Google Analytics 4 using Google Tag Manager. We are going to set up a new GA4 property for dual tracking. Our goal here is to have GA4 tracking and collecting data alongside your existing Universal Analytics using Google Tag Manager so that we have both sets of data being collected until Universal Analytics reaches end of life.
Here are the steps to setup Google Analytics 4 to track alongside Universal Analytics using Google Tag Manager.
- Create your new Google Analytics 4 property
- Create a data stream for your new GA4 property
- Copy the measurement ID from your new data stream
- Create your Google Analytics 4 Configuration Tag in Tag Manager
- Paste your Measurement ID and set up tag firing for All Pages
- Preview your new tag using Google Tag Manager Preview Mode
- Publish your new tag in Google Tag Manager
- Confirm that you are seeing traffic in your new Google Analytics 4 Profile
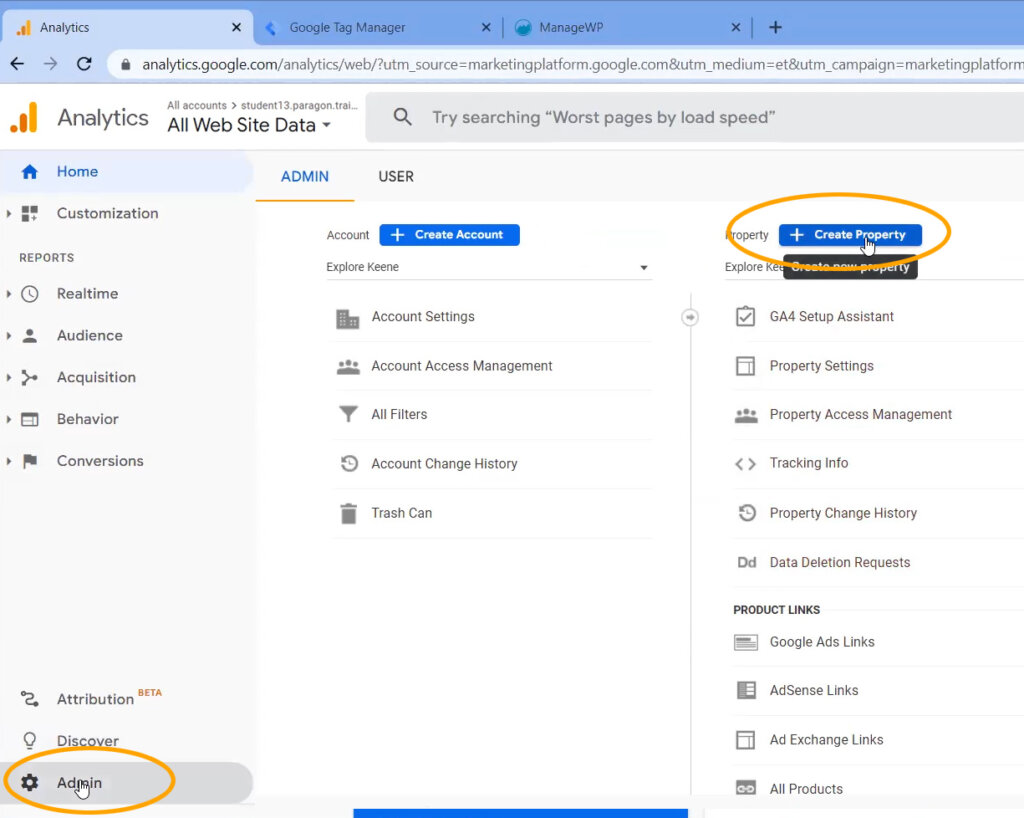
1. Create your new Google Analytics 4 property
After logging into your Google Analytics account, enter the Admin screen by clicking on Admin in the bottom of the left menu. From there click on Create Property.
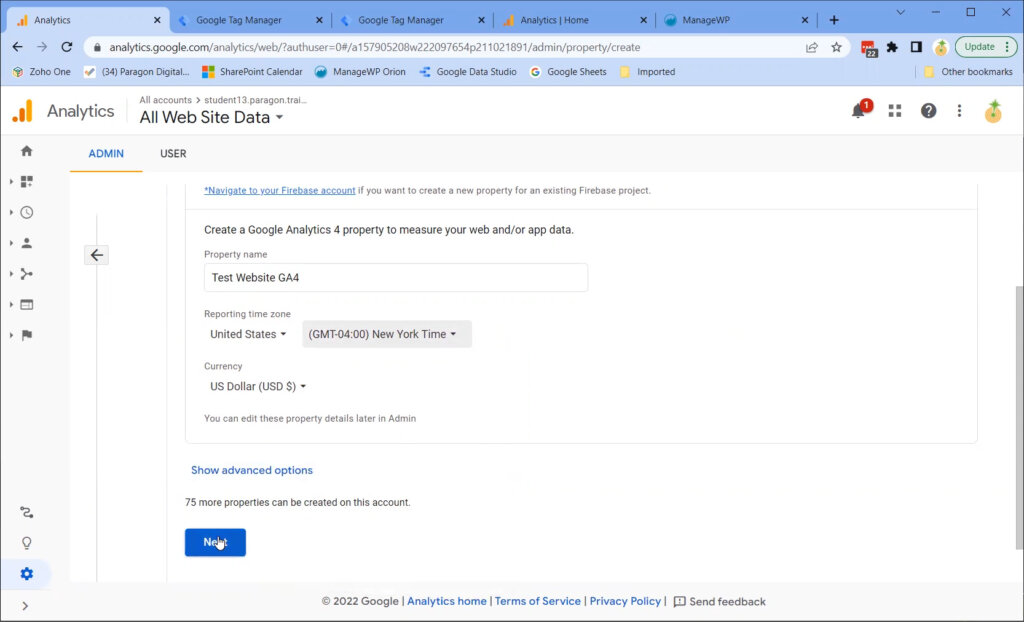
Next you will want to enter the name of your property. It’s generally a good idea to keep it consistent with the naming convention that you’re already using for your account. You will also want to select the time zone that the business is located in. You can skip the Advanced Options and Demographic information; they do not affect account setup. Go ahead and hit Next.
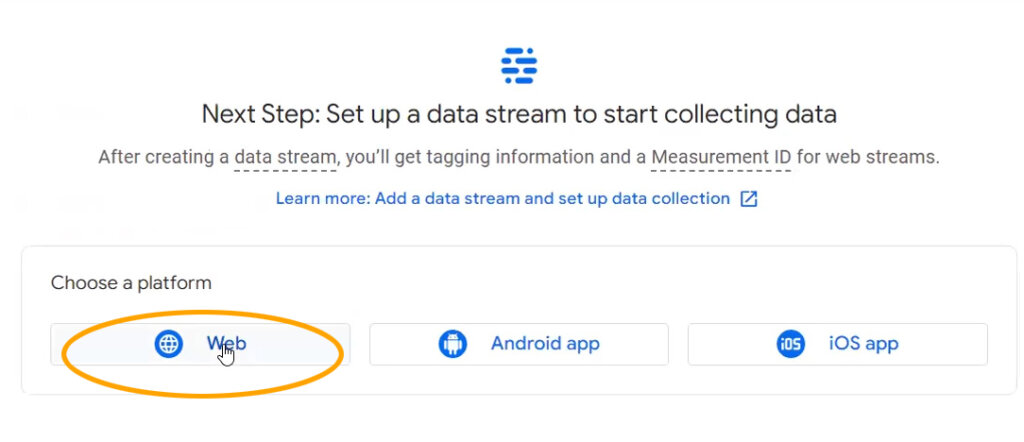
2. Create a data stream for your new GA4 property
After creating your new GA4 property you will now need to create an associated data stream, which is needed to send website events to your new property. Since this is for a website, you will want to select Web for your data stream type. In the future you can set up additional streams as needed within your new property.
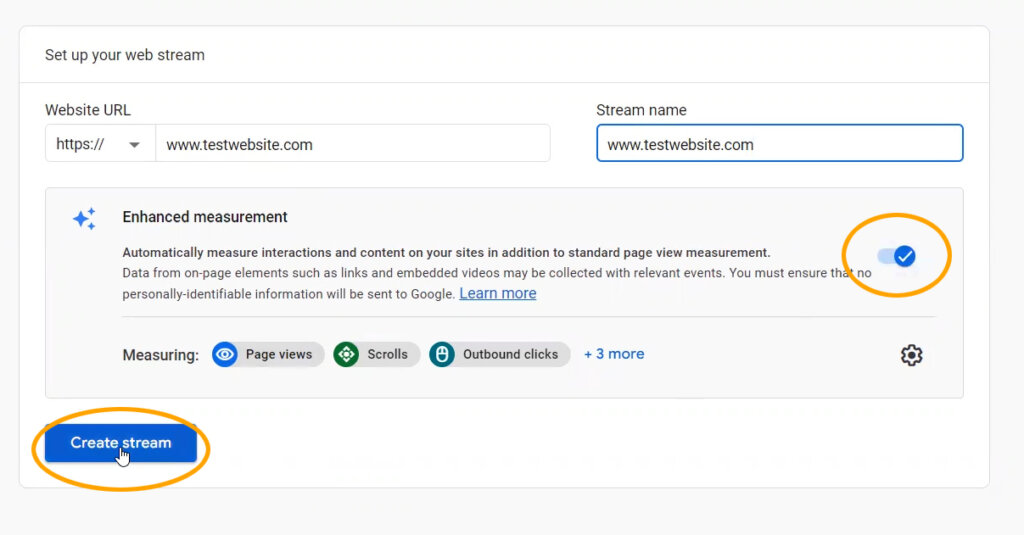
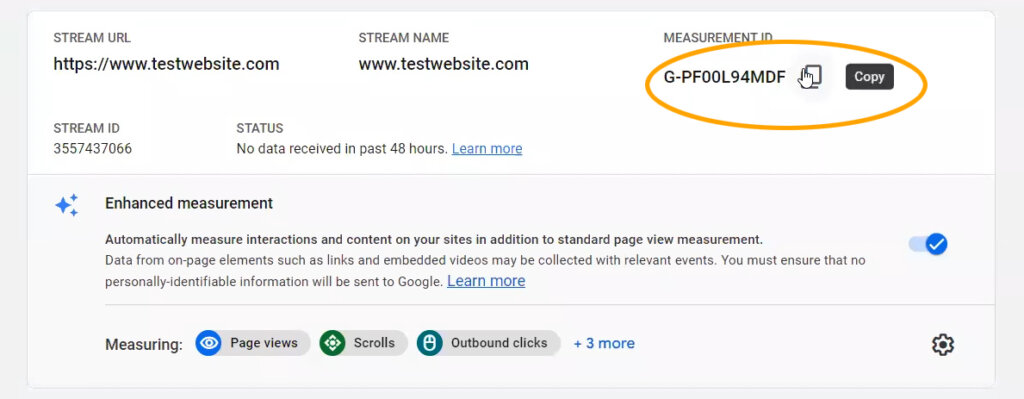
Enter the website URL and stream name. In this instance I chose to use the URL for both, however some people prefer to use the website name. You will also want to make sure that Enhanced Measurement is selected. This will ensure that all of the most important interactions that happen on your website are tracked in your GA4 property.
3. Copy the measurement ID from your new data stream
After clicking Create Stream you will be presented with our new Measurement ID. Copy that ID, we will be entering it into Google Tag Manager next.
4. Create your Google Analytics 4 Configuration Tag in Tag Manager
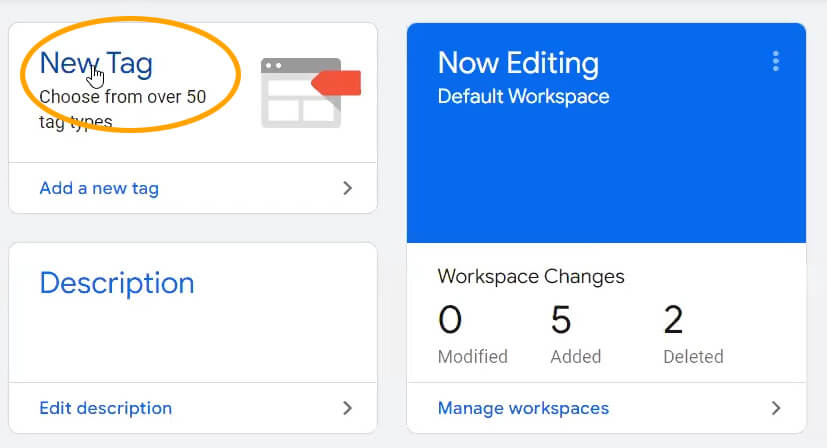
From your Google Tag Manager account, click on New Tag to get started.
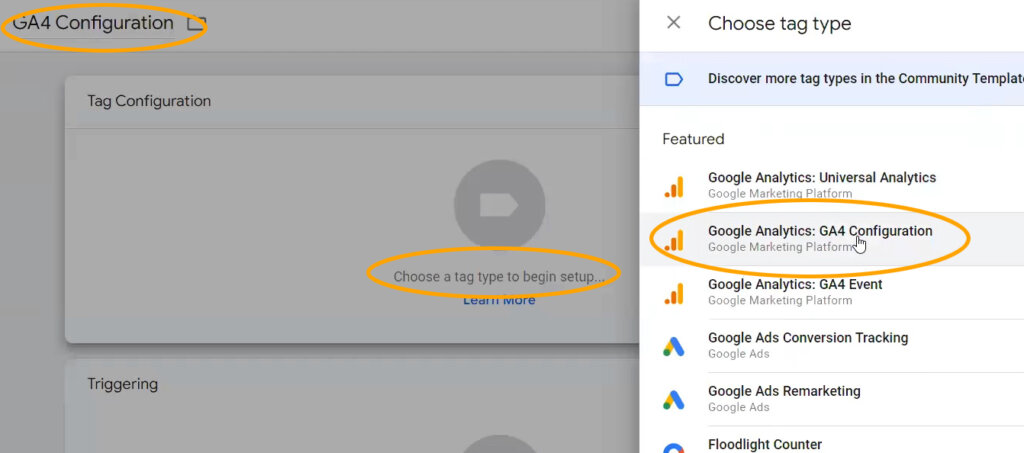
Enter a name for your new tag. I have chosen to use GA4 Configuration since that is the type of tag you will be selecting. After naming your tag click in the Tag Configuration box and then select Google Analytics: GA4 Configuration.
5. Paste your Measurement ID and set up tag firing for All Pages
Paste the Measurement ID that you copied earlier when setting up your Data Stream in Google Analytics into the Measurement ID field. Also make sure that Send a page view event when this configuration loads is checked since you will likely want to automatically track pageviews.
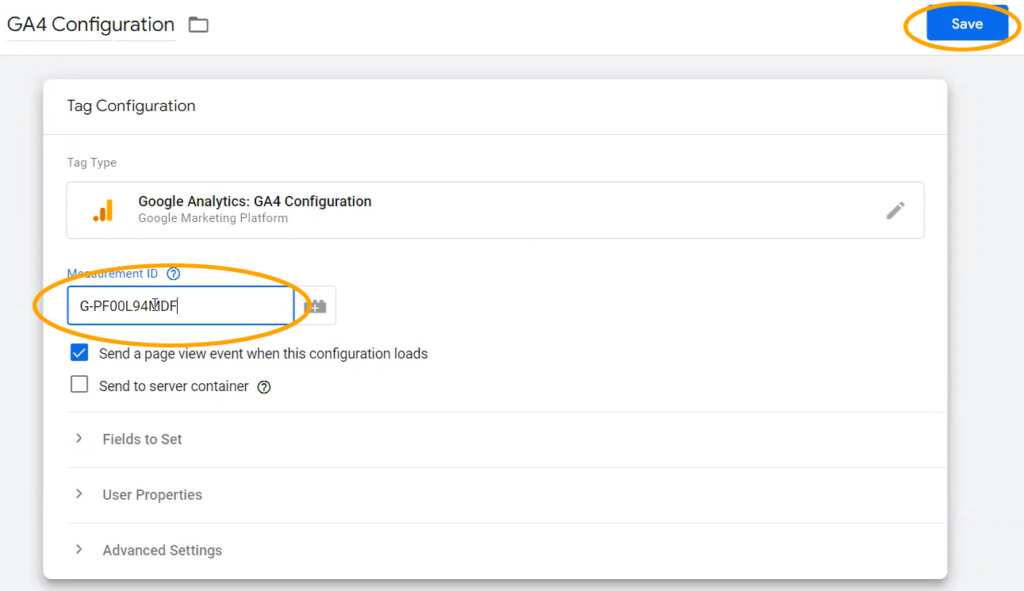
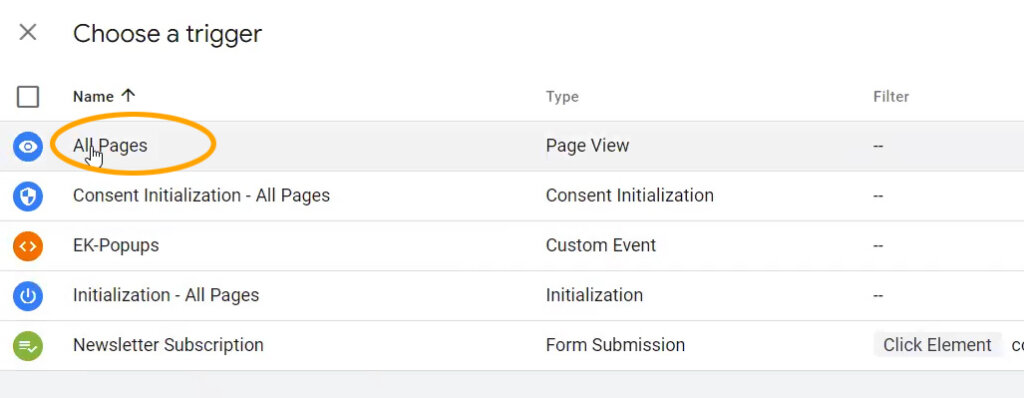
Then proceed to Triggering options below and select All Pages, and then Save.
6. Preview your new tag using Google Tag Manager Preview Mode
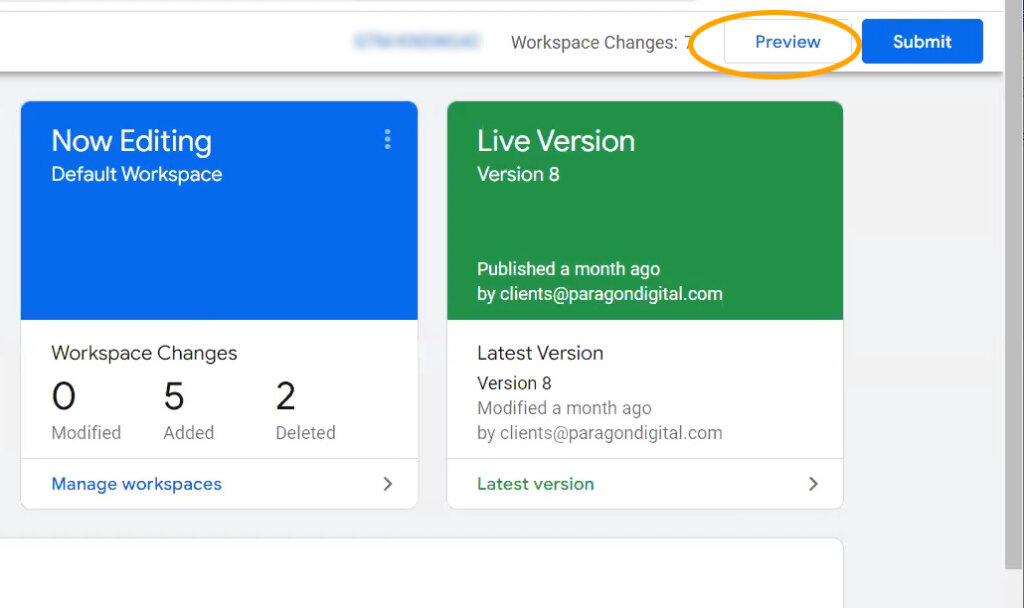
Now it’s time to use the Google Tag Manager Preview Mode to make sure that your new tag is firing properly. From your main Workspace view hit Preview in the top right to test your changes.
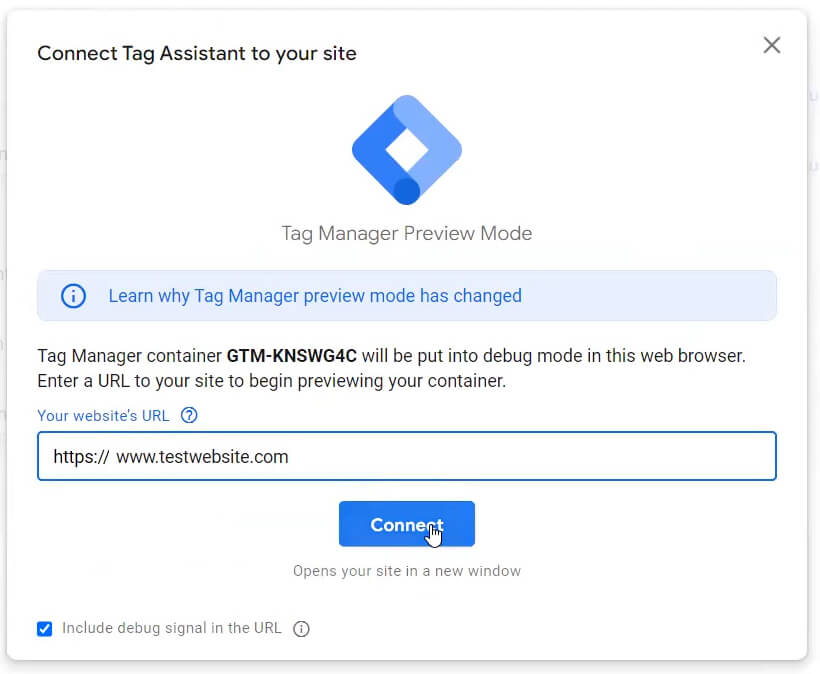
Enter the URL of the website that you would like to connect to for testing and hit connect. Your website will then open and connect in another tab.
You should see now your new GA4 Configuration tag appearing along with the other tags on your website. Success!

7. Publish your new tag in Google Tag Manager
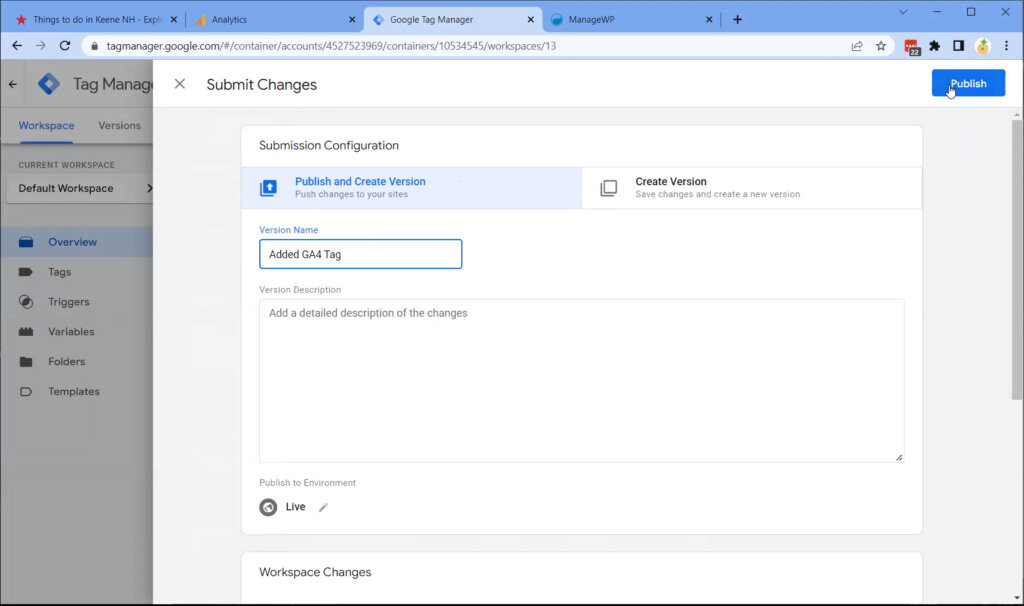
You can now close out of debug mode and hit Submit to make your changes live. Once the Submit Changes window pops up enter a version name and description for your own reference and then click Publish.
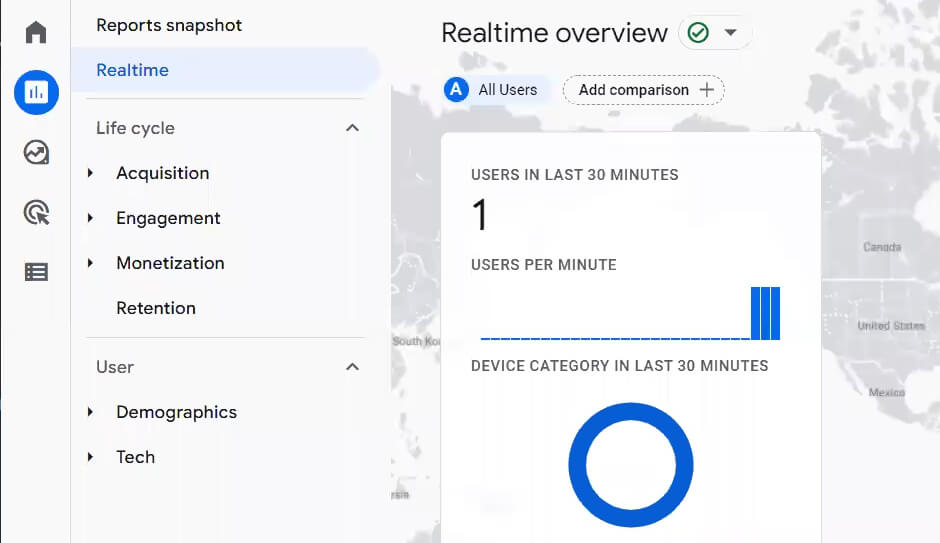
8. Confirm that you are seeing traffic in your new Google Analytics 4 Profile
As a final step it’s a good idea to visit your website to generate some traffic and then go into the new GA4 property that you created and make sure that you are seeing realtime traffic show up. This can sometimes take 5-10 minutes to start appearing.
Final Thoughts
After completion you should now be successfully recording your website data and events to both your existing Universal Analytics property and your new Google Analytics property. This should leave you well prepared for when Google stops collecting data in Universal Analytics.
As a next step be sure to set up your goals in your new GA4 property as well so that you can also collect conversion data in both properties.
For more information about GA4 be sure to download our Ultimate Guide to Google Analytics 4.